
Whether you’re thinking of starting a podcast and not sure how to record virtually, or you’ve been using Zoom to record your episodes and want to learn how to get better quality recordings, you’ve come to the right place! No, you don’t need a podcast recording studio nowadays! With the technology available today, you can record episodes from the comfort of your own home or office!
With online platforms like Riverside.fm or Zencastr, you can record HD audio and video files right from your browser window. They are incredibly easy to use but require a monthly subscription to access. So while these are our preferred platforms, if budgets are tight, you can certainly use your existing Zoom account to record your episodes virtually.
That said, at the end of the day, to get your podcast to stand out from the crowd, the first step is to ensure a great listening experience. This means ensuring that your recordings’ quality is up to broadcast standards. To do this, it’s vitally important to pay attention to details like microphone setup, background noise reduction, and audio quality – But this also applies to your Zoom platform as you need to ensure that your settings are optimized for podcast recording. Let’s dive into the steps to ensure your Zoom platform is optimized for podcast recording.
Podcast Recording with Zoom: A Two-Phase Setup
When I’m working with clients who are using Zoom to record their episodes, we break the setup process into two segments:
- Pre-recording production settings
- On-call user recording settings
The pre-recording settings are to be set, you guessed it, before your recording by you, the producer/host. These include what file formats you’d like to record and where you’d like to record to. These settings will remain saved until you change them, so they are usually a set-and-forget process.
The on-call user settings are to be set by each speaker (including yourself) on each call before hitting the record button. Let’s dive into each phase and break down the step-by-step instructions you must follow to ensure a great experience using Zoom for your podcast.
Pre-recording Production Settings
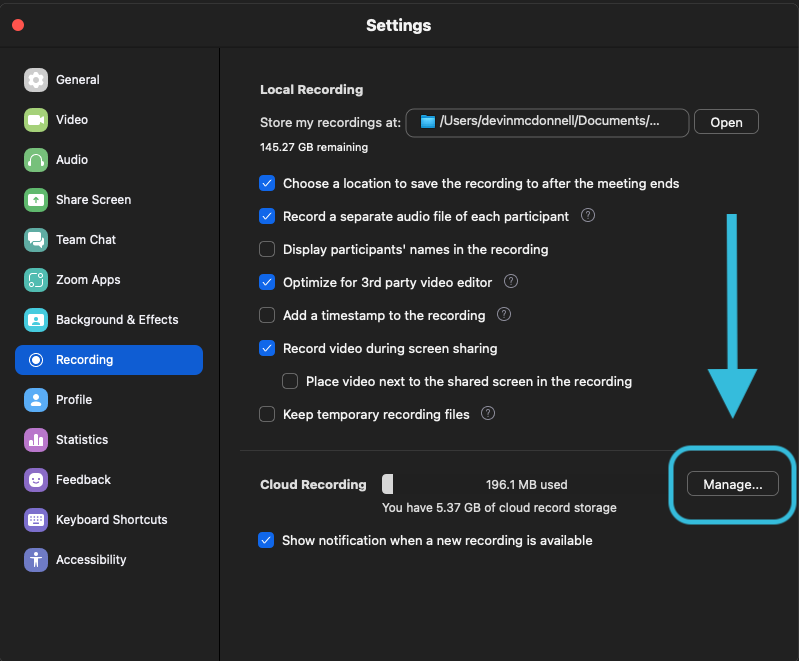
In the “Settings” tab (or “Preferences” for others), select the “Recording” option. If you want to record locally to your computer, you’ll want to do the following:
- Choose a folder with accessibility to save your recordings. Additionally, check the first checkbox on the list to provide an extra option for saving at the end of the call (just in case we change our mind).
- “Record a separate audio file for each participant.” This is INCREDIBLY IMPORTANT. This option will record a separate, isolated audio file for each participant and allow for a sufficient editing process. With this option enabled, If there is a noise on one speaker’s microphone, you can isolate it and edit it out in post-production!
- If you plan to use video footage from the call, check “Optimize for 3rd party video editor.”
- Also, check “Record video during screen sharing” to ensure you capture footage of any shared screens during the conversation. This setting is essential if you share images, presentation slides, or even pull up information candidly.

Recording To The Cloud
You also have the option to record to the cloud rather than your local computer. This is helpful if you’re working with an editor who can access files in the cloud folder directly – no need to manage file delivery in post-production! To do this, in the “Settings” tab, under the “recording” option, click the “Manage” button and log into your Zoom account via your web browser.
Once in your account on your browser, you’ll want to ensure you’re in “Settings” and then click “Recording.”
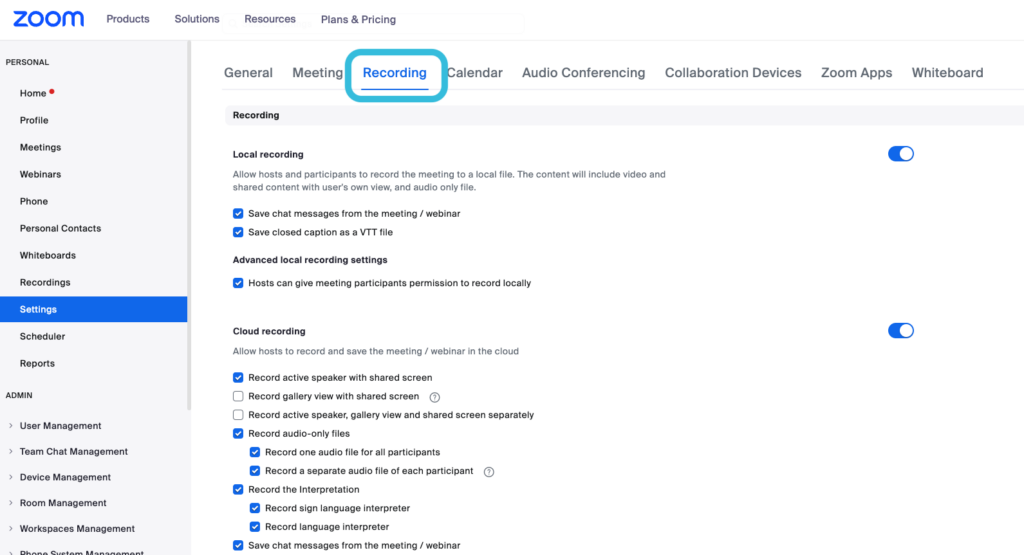
Once here, The first thing you’ll need to do is ensure that cloud recording is toggled on. Then you’ll need to select the options we selected above for the local recordings. Again, the most important thing is to remember to choose “Record separate audio files for each participant.”
There are some additional options and considerations available here, including:
- You’ll need to check the “Record audio-only files” box in order to get additional audio options. Once checked, click both “Record one audio file for all participants” as well as “Record a Separate audio file of each participant.” This will give you individual audio files as well as a master audio file of the entire conversation.
- If recording video, you might want to consider choosing the option “Record active speaker, gallery view and shared screen separately,” which will give you individual video files for your editor to work with in post-production.
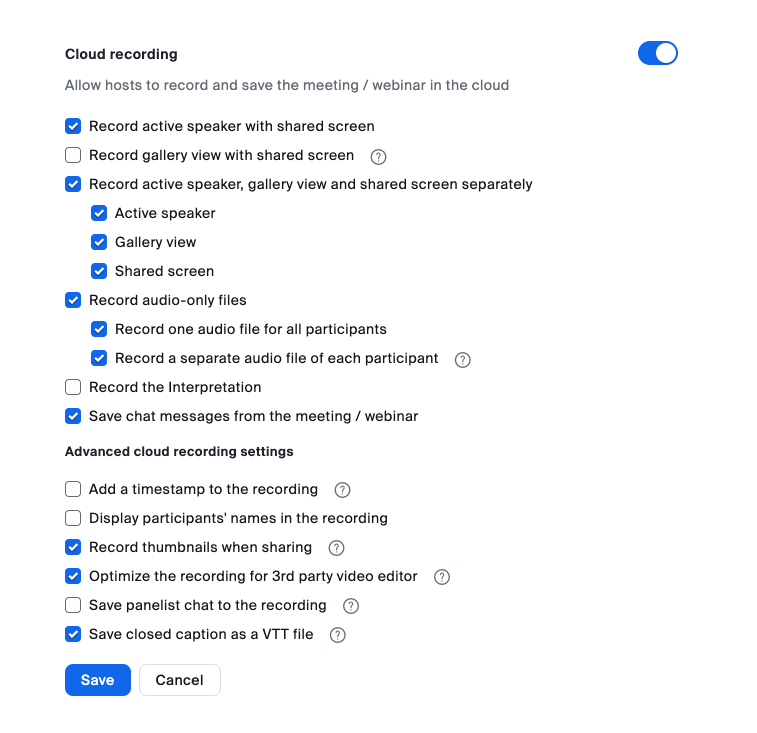
Once these are set, be sure to click the save button at the bottom of your screen and you should be all set for future recordings.
Pro Tip:
We usually recommend you optimize your settings for both local AND cloud recording; this way, no matter which way you choose to record, your settings are already optimized, and you don’t need to remember to go back and change settings around. Additionally, while these settings save until changed, we recommend giving them a quick rundown view before recording to ensure nothing has changed since your last one!
On-Call User Recording Settings
Ok, so you’re on the Zoom call with your guest(s). Before recording, each participant (including yourself) must address several vital settings. When each speaker logs onto the Zoom call, ask them to click into their audio settings and make the following changes:
- Make sure the correct output is set in the speaker section. Choose the appropriate output from the dropdown list. You can change to your headphones here if the audio is playing through your live speakers.
- Ensure the correct microphone is selected in the microphone section. A good way to tell if the proper microphone is set is to click the “test microphone” button and then scratch or lightly tap the microphone you’re using. If you don’t hear anything through your headphones, or don’t see the input meter jump, you’ll need to click the dropdown and change your input to the correct microphone.
- Uncheck the “Automatically adjust microphone volume” option. If left on, it will cause unwanted volume variances throughout the recording.

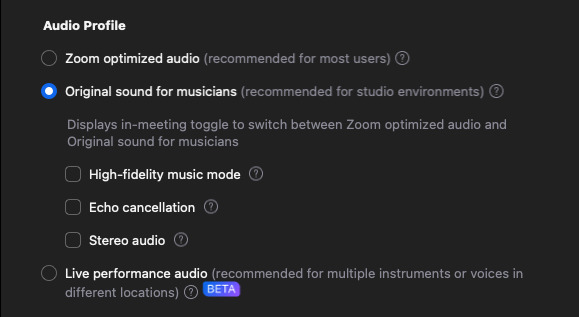
- Check “Original sound for musicians” to disable any audio processing by Zoom.
- Choose Your “Echo Cancellation” setting. This feature eliminates echo and feedback loops when you’re not wearing headphones. Ideally, each speaker should be wearing headphones, so we can uncheck this if you are wearing headphones. Otherwise, leave this checked. If you start experiencing feedback loops/echos during the meeting, it’s likely because someone isn’t using headphones and has turned off the echo cancellation.
- Uncheck “stereo audio” to ensure the audio is not recording in stereo. Yes, podcast episodes are published as stereo files, but individual recordings are recorded in mono and then combined/edited into a final stereo episode.
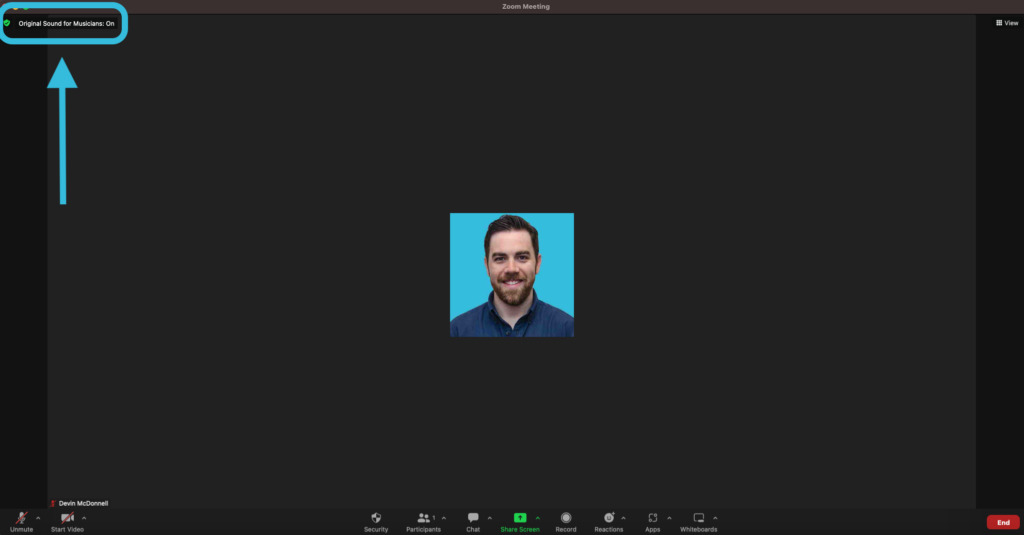
Once those settings have been selected and everyone backs out to the main meeting view, they should see an icon at the top left of the screen indicating whether “original sound” is turned on or off.
You want to make sure that “Original Sound” is turned on. If it says “off,” just click the icon to toggle it on.
To Sum It Up:
Using Zoom to record your podcast can be an easy way to connect with your guests and create engaging content for your audience. With the proper setup and attention to detail, you can produce high-quality recordings that will sound great to your listeners.
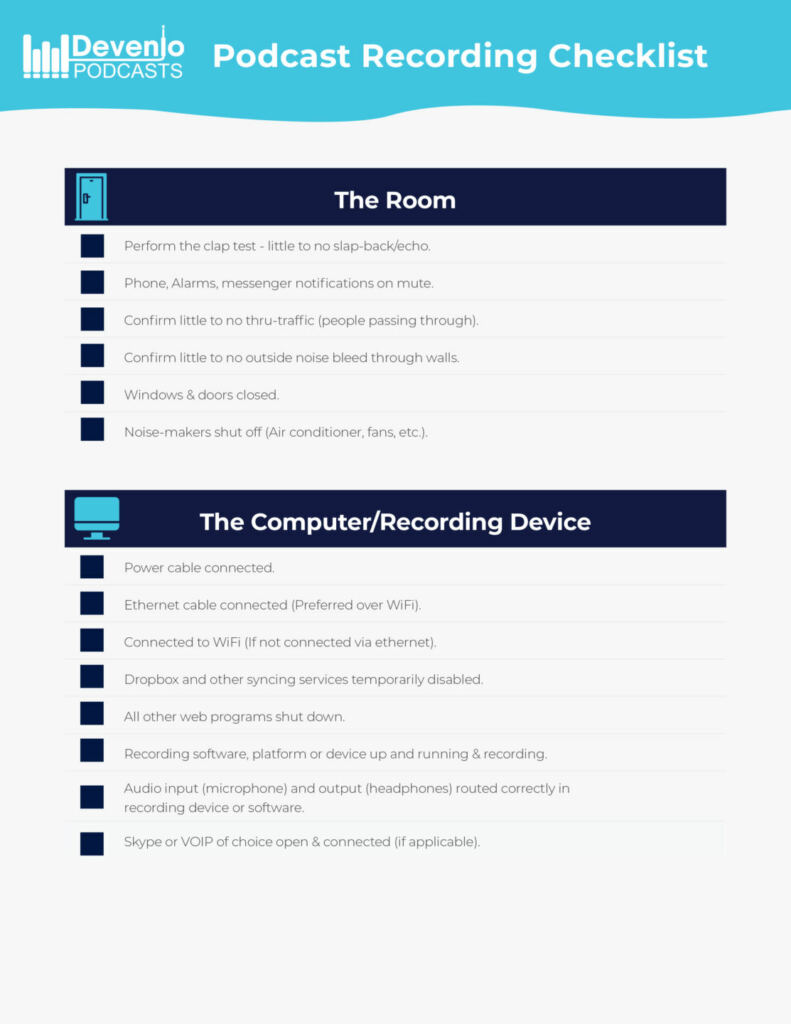
Step one to standing out is ensuring your podcast delivers a great listening experience. This starts with the audio quality of your episodes, and you can make sure you’re prepared to do this while using Zoom by following the steps outlined above! All you need to do next is to download our Podcast Recording Checklist, press record and have a great conversation!